Petit point embroidery is carried out using two of the six threads of one color wound on the cardboard.
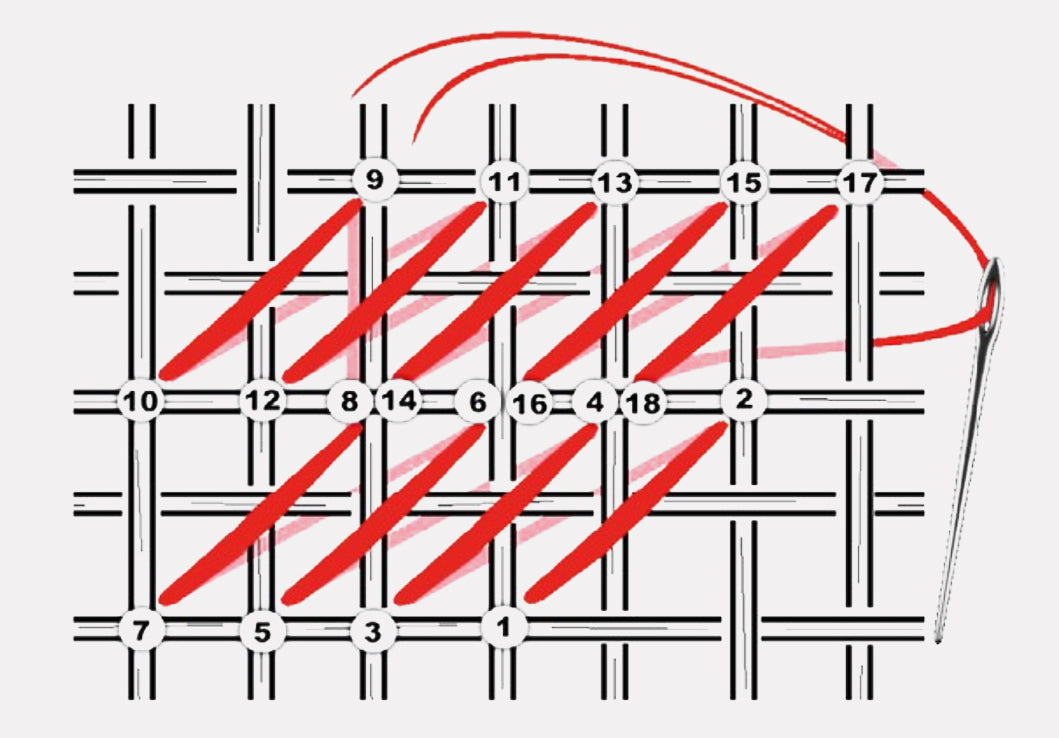
First of all, let's imagine a square formed by four points of the fabric. The line that we are going to draw must be oblique to the square, so we must always take the thread towards the part that will be the face of the embroidery and always from the lower left corner to the upper right corner of the imaginary square.
The next row must be done like the previous one, but in the opposite direction, although always preserving the direction of the line. That is, now we will draw the same line inclined to the right, but from the upper right corner to the lower left corner.
In case you have to skip a few squares in between, the embroidery should start in the second row. From the second row we will go down to the first and then we will return to the second to continue climbing to the upper rows (Look at the numbers in the image).

The difference between the petit point technique and cross stitch can only be seen on the back of the embroidery. The correct execution of the cross stitch avoids the appearance of oblique lines above the already embroidered parts, which is not ruled out in the petit point technique.